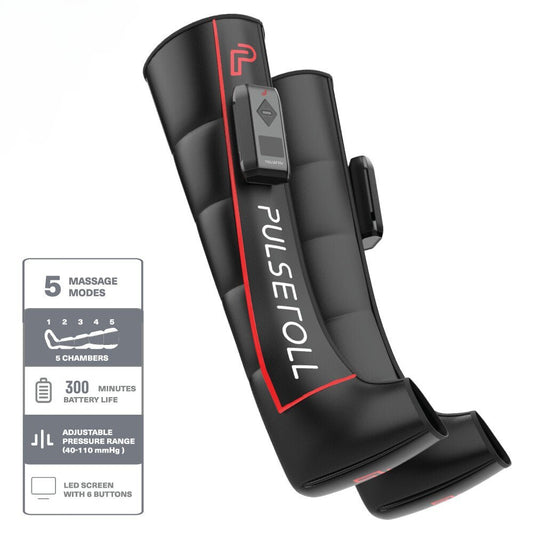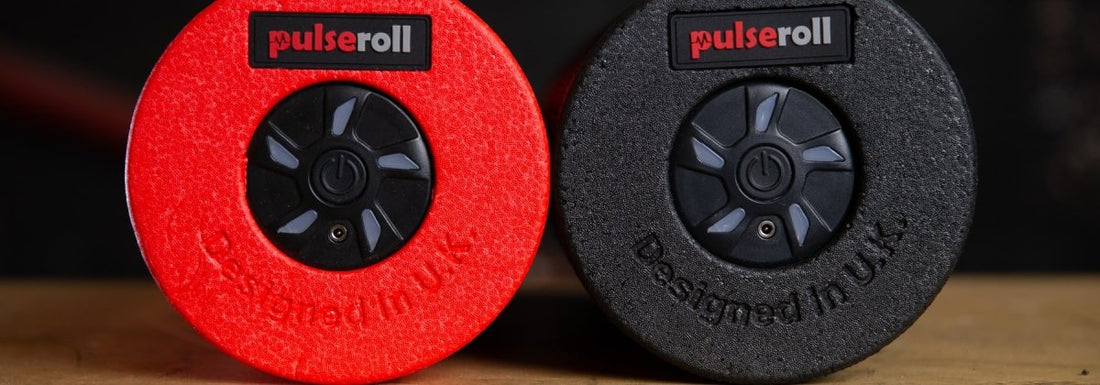
It’s December and the festive season is upon us. If you’ve had a busy year focussing on your health and fitness goals, you might be looking to take a step back, relax and recover over the Christmas period. Whether or not you’ll be taking a break from training, you can use our 12 days worth of vibrating foam roller techniques to help your body to recuperate and relax. Using a vibrating foam roller will be easier, as the oscillation will do a lot of the work for you, but you can also perform these stretches with a standard foam roller.
Related article: What is a foam roller used for and why should you use it?
Jump to:
- Day 1: Shoulders
- Day 2: Neck
- Day 3: Back
- Day 4: Lats
- Day 5: Chest
- Day 6: Arms
- Day 7: Hips
- Day 8: Glutes
- Day 9: Quads
- Day 10: Hamstrings
- Day 11: Calves
- Day 12: Feet
- Is Foam Rolling Relaxing?
- For How Long Should You Foam Roll?
- Should You Foam Roll Every Day?
Day 1: Shoulders
Poor posture is now a very common problem, with the main causes being long periods of sitting during work, as well as spending evenings on our smartphones and laptops. This unnatural position has led to problems such as painful shoulders and tension headaches. In fact, a recent study linked depression to this upper-body muscle tension (1).
Office working and working from home can both be contributing factors to poor posture due to unnatural seating positions. They can lead to tension in the shoulders, which we can release with this foam roller stretch (2).
- Lie on your side.
- The foam roller should be on the outside of your shoulder.
- Engage your core and lift your hips off the floor, putting pressure on your shoulder muscles.
- To make this easier, you can support your body with the opposite arm.
- Slowly roll until you feel a tight spot or sensitive area.
- Hold for up to 2 minutes.
Day 2: Neck

If you’re one of the many of us working from home the last two years, you might find that you’ve been experiencing some neck pain. Why not try a relaxing neck massage? (3) (4)
- Rest your neck on the foam roller.
- Alternatively, you can use the peanut roller.
- Relax your upper body and sink into the roller.
- Rotate your head to the left and right for 2 minutes.
- Engage your core and slowly lift your hips off the floor.
- This will increase pressure on your neck muscles.
- Use your arms to support your body weight
- Slowly roll your neck on the roller.
- When you find any tight spots, hold the pressure.
Day 3: Back
Upper Back
Using a foam roller for your back can be hugely beneficial. By improving blood flow to the area, you’re also helping to combat inflammation. (5)
- Lie on your back with the foam roller below your shoulder blades.
- Bend your knees, with your feet flat on the floor.
- Bring your elbows together and support the back of your head with your hands. This ensures that your shoulder blades are in the correct position, whilst also making it easier for you to support your head.
- Engage your core and lift up your hips off the floor.
- If you’re using a standard foam roller, roll up and down from your shoulder blades to the bottom of your ribs for 30 to 60 seconds.
- If you’re using a vibrating foam roller, slowly roll until you feel a tight or sensitive area. Hold for up to 2 minutes, allowing the tension to slowly fade away.
Tip: If you’re focussing on the top of the shoulders and trapezius, you can use a smaller massage product such as the peanut roller. Make sure to avoid your neck and spine.
Lower Back
When using a foam roller on the lower back, it’s important to avoid the spine and the centre of the back. (6)
- Lie with your back and shoulders touching the floor.
- Your knees should be bent, with your feet flat on the floor.
- Place the foam roller under your lower back just above your tailbone.
- Slowly raise your legs in the air and bring your knees in towards you.
- One leg at a time, slowly lower your leg until your ankle is touching the floor, then hold the position for around 10 seconds.
- Switch legs and do the same on the opposite side.
- Repeat this process around 3 times.
- Lift your knees again, one at a time and bring them towards your torso.
- For added stability, you can hold on to the ends of your foam roller.
- Keeping your knees together, slowly roll to one side and hold your position for a few seconds.
- Now repeat this on the opposite side.
- Repeat this movement up to 3 times.
Tip: Be careful not to overextend your spine when using a foam roller on your lower back.
Day 4: Lats
Your latissimus dorsi muscle connects to your spine and is involved in lower back- and shoulder movements. It’s a large muscle, which can become strained, potentially causing pain. Foam rolling your lats with a vibrating foam roller can help to loosen the muscle and improve blood flow. Why not try this exercise for foam rolling your lats to see what we’re talking about? (7)
- Lie on your side, with the foam roller at the top of your lats, under your armpit.
- For comfort, your arm which is closest to the ground can be extended so it’s in a straight line with your body.
- Lift yourself onto the roller and gently toll it down your body/
- When you come across any pressure points, hold for 30 to 60 seconds.
- Gently rock from side to side, then repeat this on your other side.
Tip: You can keep both of your legs straight, or bend one of them at 90 degrees, whichever is most comfortable for you.
Day 5: Chest
You can use our vibrating foam roller to loosen tight chest muscles.
- Lie face-down on the floor.
- Stretch out your arms to the side of your body.
- Place the foam roller beneath one of your arms and pull it tight to your body.
- Stretch out your free arm in front of you and place your hand on the floor.
- Roll your body gently upwards on the foam roller so it’s sitting comfortably on your pec muscle.
- Use your body to apply pressure against the foam roller.
- This exercise can be slightly more difficult for women, but it can still be done by placing the roller in a more comfortable position and applying slightly less pressure.
Tip: With a standard foam roller, you can rock your body gently from side to side, but this is not needed with a vibrating foam roller, which does more of the work for you.
Day 6: Arms
If you experience muscle pain in your arms and want to improve your recovery time, you may want to massage your biceps brachii and biceps brachialis. The biceps brachii make up the bulging, middle part of the bicep, whereas the biceps brachialis is located deeper inside the middle outside of the upper arm, so the two muscles will require different foam roller techniques. (8)
Biceps brachii
- Lie on your stomach, with the foam roller parallel to your body.
- Extend your arm to the side and place it on top of the foam roller.
- Apply pressure using the top of your upper arm.
- If you’re using a standard foam roller, roll gently back and forth.
- With a vibrating foam roller, the vibrations will do most of this work for you.
Biceps brachialis
- Place the top part of your shoulders onto the foam roller.
- Gently roll your shoulder, going just past the insertion point (where your bicep and shoulder separate).
- Hold the vibrating foam roller in place in the middle outside part of the arm.
- Tilt your body slightly back and forth to ensure the entire bicep muscle is stretched.
Triceps
- Lie down on your side and stretch out your arm above your head.
- You can keep your arm straight or bend it at the elbow - whichever is most comfortable for you.
- Position your free hand flat against the floor for added stability.
- Position the foam roller underneath the upper arm, above the elbow.
- Lean gently from side to side.
- When you reach any trigger points, hold for around 30 seconds.
Forearms
- Kneel on the floor and lean forwards, placing your arms on the foam roller, just above the elbows.
- Gently apply pressure and roll steadily backwards and forwards.
- Slowly rotate your arms as you continue to roll backwards and forwards.
- Hold for 30 seconds when you reach any trigger points.
Day 7: Hips
Your hip flexors are required for a number of functions, whether that be lifting your knees or bending your hips. As they’re heavily involved in exercise, they can shorten and become tighter. Use our vibrating foam roller to loosen your tight hip flexors and massage any knots! (9)
- Lie on your front, with the foam roller beneath your hips.
- Relax your body into the floor and let the vibrating foam roller do its work for 30 seconds.
- You can cross your arms under your head for comfort.
Day 8: Glutes

Tight glutes can be hard to target, but this glute exercise should help you to increase blood flow, flush out lactic acid and loosen your muscles. (10)
- Place your foam roller on the floor and sit directly on top of it, with the roller beneath your glute.
- You can place your hands behind you for support.
- Bend both of your legs and use your left hand to place your right ankle onto your left knee.
- With your hand on either your ankle or your thigh, lean slightly towards your right.
- Gently rock back and forth.
- When you find any trigger points, hold for 20 seconds.
- Repeat this on the other side.
Tip: Why not try a variation of this stretch using our Pulseroll Ball?
Day 9: Quads
Your quads are involved in running, walking and jumping movements amongst others. Relax your quads and help reduce your chance of strains and similar injuries. (11)
- Lie face down on the floor.
- Place the foam roller under your quads, just above your knees.
- Place your arms on the floor, with your elbows under your shoulders.
- Slowly push yourself backwards to roll the foam roller up your legs.
- Roll back down again by changing direction.
- Hold for 30 seconds at any trigger points, letting the vibrating foam roller do its work.
Day 10: Hamstrings
Help release tension in your hamstrings with our vibrating foam roller hamstring exercise.
- Sit on the floor and place the foam roller under your thighs.
- Extend both of your legs in front of you.
- For balance, place both of your hands on the ground behind you.
- Push upwards and support your weight with your hands.
- Apply pressure on the foam roller.
- Slowly roll back and forth.
- Apply pressure for about 30 seconds at any trigger points.
Day 11: Calves
Foam rolling your calves can release pressure in the muscles and improve range of motion and flexibility. (12)(13)
- Place the foam roller underneath your calf.
- Make sure that your toes are pointing upwards.
- Apply pressure and gently roll front to back.
- You can also place one ankle over the other.
- Stretch out your toes and lean from side to side as you apply pressure.
Day 12: Feet
Foam rolling your feet can be a very relaxing experience - akin to a deep tissue foot massage and it can be done sitting, standing or even lying down. (14)
Sitting Down
- Sit up straight in your chair and place both feet comfortably on top of the vibrating foam roller.
- Gently apply pressure with your feet.
- When you find a trigger point, hold for 20 seconds.
- You can roll your feet back and forth and find other trigger points to hold.
Standing Up
- Stand tall and place the vibrating foam roller under one foot.
- Flex your foot and apply pressure.
- When you find a trigger point, hold for 20 seconds.
- You can roll your foot back and forth gently from heel to toe with your foot still flexed.
Lying Down
- Lie flat on your back and bend your knees upwards.
- Place the vibrating foam roller under both feet, keeping your legs bent.
- Apply pressure with your feet.
- When you find a trigger point, hold for 20 seconds.
- You can roll your feet back and forth to find other trigger points.
Is Foam Rolling Relaxing?
Foam rolling is a massage technique involving self-myofascial release. It can be used to increase range of motion, improve blood flow, release muscle knots and loosen tight muscles, which can help to relax the body.
For How Long Should You Foam Roll?
We recommend limiting foam rolling to 30 to 90 seconds per muscle group, with 10 seconds of stretching in between each roll.
Should You Foam Roll Every Day?
You should only need to use a foam roller once per day for each targeted muscle group. If you’re taking it easy, you can focus on different muscle groups each day.
Conclusion
Hopefully, you’ve managed to relax and recover over the festive season and you’re feeling ready to tackle the new year. Using a foam roller is not only beneficial for recovery and relaxation, it can also help to prevent injury.
Foam rolling loosens tight muscles, increases blood flow, helps to flush out lactic acid, and to improve flexibility and range of motion. If you want to continue reaping the benefits of foam rolling, there are plenty more guides on our blog, beyond the 12 days of exercises we’ve taken you through in this article.
Related article: Best Full Body Foam Roller Exercises
References
- Lundberg, U., Dohns, I., Melin, B., Sandsjö, L., Palmerud, G., & Kadefors, R. et al. (1999). Psychophysiological stress responses, muscle tension, and neck and shoulder pain among supermarket cashiers. Journal Of Occupational Health Psychology, 4(3), 245-255. doi: 10.1037/1076-8998.4.3.245
- https://pulseroll.com/blogs/blog/best-full-body-foam-roller-exercises
- https://pulseroll.com/blogs/blog/best-full-body-foam-roller-exercises
- Rodríguez-Fuentes I, De Toro FJ, Rodríguez-Fuentes G, de Oliveira IM, Meijide-Failde R, Fuentes-Boquete IM. Myofascial release therapy in the treatment of occupational mechanical neck pain: a randomized parallel group study. Am J Phys Med Rehabil. 2016;95(7):507–15. [PubMed]
- https://pulseroll.com/blogs/blog/the-right-way-to-use-a-foam-roll-for-your-back
- https://pulseroll.com/blogs/blog/the-right-way-to-use-a-foam-roll-for-your-back
- https://pulseroll.com/blogs/blog/the-right-way-to-use-a-foam-roll-for-your-back
- https://pulseroll.com/blogs/blog/bicep-foam-roller
- https://pulseroll.com/blogs/blog/foam-roller-hip-flexors
- https://pulseroll.com/blogs/blog/foam-roller-glutes
- https://pulseroll.com/blogs/blog/foam-roller-quads
- https://pulseroll.com/blogs/blog/the-complete-guide-to-foam-rolling-your-calves
- https://pulseroll.com/blogs/blog/calves-foam-roller
- https://pulseroll.com/blogs/blog/feet-foam-roller